From Saturday 13/2/21 Class
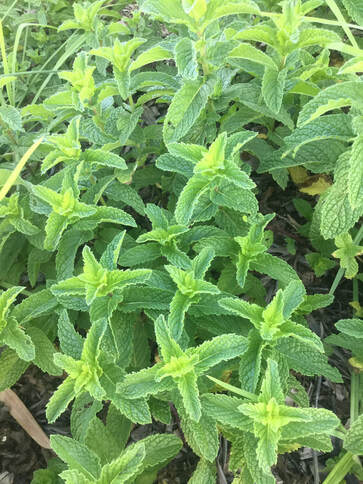
Here's more info on preparing herbal tinctures:
https://blog.mountainroseherbs.com/guide-tinctures-extracts
Here's more info on preparing herbal tinctures:
https://blog.mountainroseherbs.com/guide-tinctures-extracts
|
From Saturday 13/2/21 Class
Here's more info on preparing herbal tinctures: https://blog.mountainroseherbs.com/guide-tinctures-extracts
0 Comments
 Homemade Health and Beauty
DIY Sunblock 1/2 Cup Almond or Olive Oil (Natural SPF 5) 1/4 Cup Coconut Oil (Natural SPF 4-6) 1/4 Cup Beeswax 2 Tbsp Zinc Oxide Powder (Natural SPF 2-20 depending on quantity) 2 Tbsp Shea butter (SPF 4-6) Essential oils (not citrus based!) for scent
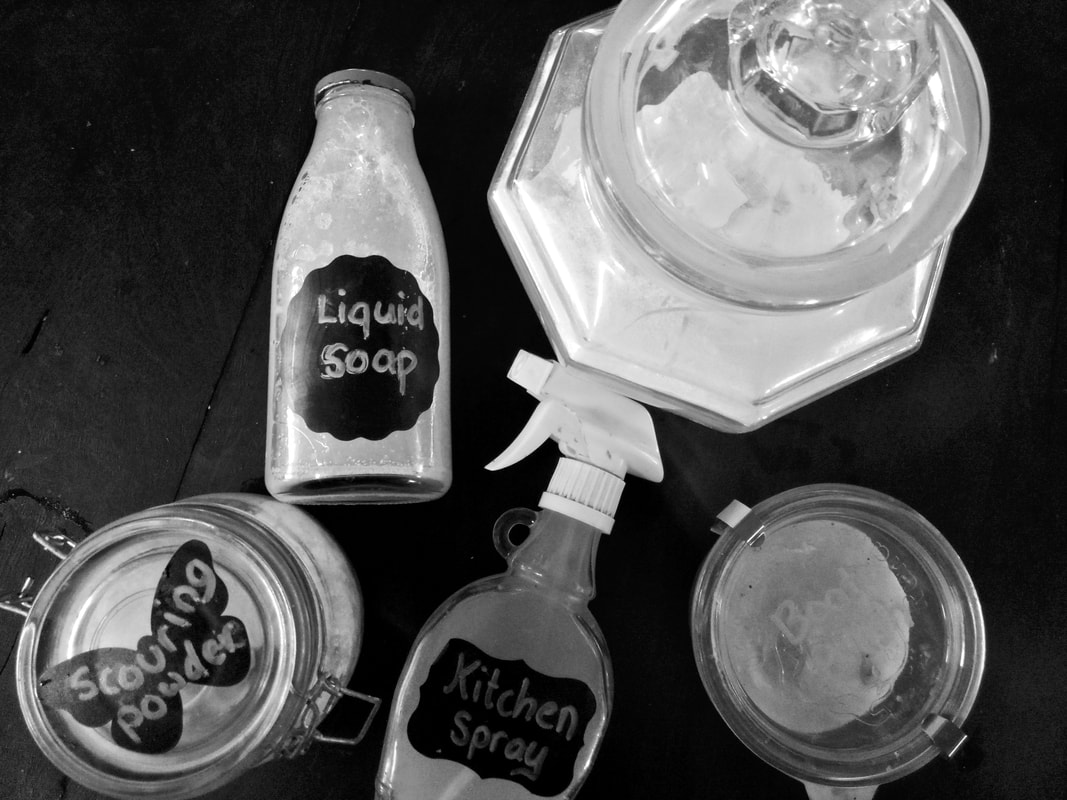
Activated Charcoal Toothpaste 3Tsp Coconut Oil 2 capsules of Activated Charcoal 1 Tbsp Bicarb soda 1Tbsp Bentonite clay 2-5 drops peppermint essential oil (optional) There are a few ways to do this. You can add all ingredients to a saucepan and gently melt, stirring until immersed. Then shut off the heat and pour into your chosen container (glass is best if using essential oils). Or you can get a small glass jar and gently melt the ingredients via double boiling, in a small saucepan. As the mixture cools, stir it now and then to stop the oil from separating. To use, spoon a little toothpaste (size of a pea or smaller) onto your brush and brush teeth as normal. Oil Pulling Oil pulling is nothing new, but has been gaining popularity recently as people look for non-toxic ways to deal with dental cavities/gingivitis etc. I personally have used this method when I’ve felt a cavity causing trouble, and it works wonders. Various oils can be used, but coconut oil is especially good as its antioxidant, skin healing and antimicrobial properties really get to work for you. 2 Tbsp oil, preferably coconut Put the oil in your mouth and gently swish for about 20 minutes. If that’s too long for you (it is a long time to go without talking, especially if you’re a mother!) then even 10 minutes will be very beneficial. Afterwards, spit the oil into the bin (not sown the sink!) or into the garden. Feel the difference? Its so cleansing. Magnesium Bath Salts Magnesium is something the majority of the population are said to be deficient in, and it’s so important for reducing inflammation, promoting oxygenation and blood flow and stimulating nerve and muscle function. It’s also known as a laxative. You can absorb this mineral transdermally by taking a magnesium bath. 2 Cups Epsom salts (available at garden stores, or online from places like Blants) 4-8 drops Lavender essential oil (optional, to make the bath a more relaxing experience) Rose or lavender buds (optional, if you’re willing to have them go down your plug hole!) Mix the ingredients together in a bowl, pour into a glass jar and seal. Use 1/2 cup of the mix in each bath and try to bathe in this for 20 mins. Oil Cleansing Method (Facial) After all the years of commercials promoting ‘oil free’ skincare, it’s kind of strange to start learning about how beneficial oils actually are for your skin! But once you learn some of these methods/recipes, you can stop buying skincare products. This oil cleanser is wonderful for getting the glow back into your skin, dealing with blackheads and restoring skin. It also removes makeup effectively, for those who wear it. “Fact: Oil dissolves oil. One of the most basic principals of chemistry is that “like dissolves like.” The best way to dissolve a non-polar solvent like sebum/oil, is by using another non-polar solvent similar in composition: Other oils. By using the right oils, you can cleanse your pores of dirt and bacteria naturally, gently and effectively, while replacing the dirty oil with beneficial ones extracted from natural botanicals, vegetables and fruit that heal, protect and nourish your skin. When done properly and consistently, the OCM can clear the skin from issues like oily skin, dry skin, sensitive skin, blackheads, whiteheads and other problems caused by mild to moderate acne–while leaving your skin healthy, balanced and properly moisturized.” Taken from acne.com You will need: 2/3 C Olive Oil (preferably good quality) 1/3 C Castor Oil (available at chemists and probably health food store…or online) A clean face washer Water as hot as you can stand to have on your face. I find our hot water tap provides a decent temperature. This recipe can be adapted if it doesn’t suit your skin. Some people with naturally dry skin may need more olive oil and less castor oil, or vice versa if you have especially oily skin. Mix your oils in a glass jar. When ready to cleanse, pour about a 20 cent piece size portion of the oil blend into your palm and massage across your hands, and then onto your face. Gently, in a circular motion, rub the oil into your skin, focusing on areas where you have trouble with blackheads etc. Massage for 1-2 minutes. Now to steam it off! Get your washer under the hot water, make sure it’s fully wet then wring it out and drape over you face. Let it sit there for about 1 minute, or until it has cooled. Repeat 1-2 times more, washing out the washer with fresh hot water each time. You can gently pat excess oil off if needed, but a small residue on your skin is fine to leave. Moisturise if desired (I use a homemade moisturising oil for this). NOTE: When you start oil cleansing, it can take a week or so for your skin to adjust. At first it might break out as impurities are cleansed! Oil Moisturiser Making your own moisturising oil is simple and customisable. I use a fractionated coconut oil base (doesn’t solidify when the weather turns cold), but other oils like almond, avocado etc are great too. Start with a glass bottle, preferably tinted (to protect the essential oils from light). I use a 10ml rollerball bottle. Larger bottles are fine too if you’d prefer to make a larger batch. In a 10ml bottle I’ll fill it about 1/3 full with pure essential oils like Sallubelle (doTerra’s beauty blend) or a custom blend with skin healing/boosting oils such as lavender, sandalwood, geranium, helichrysum, cedar wood, and roman chamomile. Please don’t use any citrus oils, which are photosensitive, unless you will only be using your moisturiser at night. Citrus oils on the skin should not be exposed to sunlight for at least 12 hours. After your essential oils are in, fill the remainder of the bottle with your carrier/base oil. To use: This depends on what sort of bottle you have used. A rollerball bottle can be rolled over the face, then the oil massaged gently in. A bottle with an orifice reducer can be very slow to use, but if you are using one, drip out about a 10 cent piece sized portion of oil into your palm and dab onto your face then massage in. Solid Perfume Much like making a scented lip balm, and so conveniently carried in your hand bag! These also make great little gifts. 4Tbsp Beeswax 2Tbsp jojoba oil (can use almond oil or another plant based oil instead) 50 drops essential oil (customise to suit your tastes) Containers for the perfume. This could be mini-tins, old Avon jars, lip balm tubes, silicone chocolate moulds. Be aware that in high heat (summer in the car for example) the solid perfume can melt and make a mess. So containers that seal well are a good idea! In a small glass jar, double boil your beeswax until just melted, and then incorporate your jojoba oil. Pull this off the heat. It should be warm, but not excessively hot, this is important in order not to damage the essential oils that are about to be added. Add your essential oils and mix in well. Now pour into your chosen containers and allow to set. Lip Balm 2Tbsp Cocoa Butter 2Tbsp Beeswax 1Tbsp almond oil OR olive oil OR jojoba oil Up to 30 drops essential oil (optional, but great for adding extra moisturising /healing properties) Lip balm pots or tubes (available online) Once again, you’ll need a small glass jar to double boil your cocoa butter and beeswax until melted. Next, shut off the heat and add your almond oil. Now mix in your essential oils. For dry winter lips, oils like lavender and geranium are great. Vanilla oleoresin is beautiful for a warm yummy scent. Or oils like peppermint and wild orange create a vibrant, energetic scent. Pour into your tubes/pots and allow to set. Oil Perfume Perfume the way it used to be…there’s a 200 year old perfumery in India that still makes traditional perfume from rose, sandalwood and other health-promoting oils. Synthetic perfumes, on the other hand, are alcohol based and often contain hormone disruptors, allergens and neurotoxins. Much like the oil moisturiser, we start with a rollerball bottle and will use a base of fractionated coconut oil, or another oil with low-scent. Essential oils are used to create the fragrance. To make a blend, its a great idea to start with a perfume blending chart that details which oils are top, middle and base notes. Top notes are the first scents that strike you when you open a bottle of perfume, but they’re also the shortest-lived. Whereas base notes take a little longer for you to register the scent, but they also linger long. Start by checking out your perfume blending chart (should be included with these recipes). What type of scents do you like? What categories do they fit into? Pick a base note (or two) that you like and drip it into your rollerball bottle. Then find a middle note or so that compliments the base. Then add your top notes. The scent will mingle and slightly change overnight as the oils settle together. When you are happy with the blend, fill the remainder of the bottle with your carrier oil and seal tightly. To use, just roll on. Please avoid contact with eyes! If for any reason you get essential oils in your eyes, use olive oil or another vegetable based oil, dripped into your eye to clean the essential oil out and relieve the pain. Water/milk won’t work! Insect Repellent There are a few ways to do this, depending on whether you prefer a water or oil based repellent. An oil based concoction will absorb into the skin and possibly last longer…and moisturise your skin at the same time. A water based blend works well in a spray bottle, but I find tends to disappear to quickly. But for anyone worries about getting oil on their clothes, a water based repellent will be safer. Water Based Repellent 1/2 cup water (or vinegar works also) 1tsp vegetable glycerine (optional, but great for blending) 50 drops total of essential oils. Examples of insect repelling EO’s are citronella, lemongrass, lavender, thyme, rosemary, geranium, clove and spearmint. Oil Based Repellent 1/4 cup carrier oil such as olive, almond or avocado oil 50-60 drops total of essential oils Green Cleaning Homemade Laundry powder 6 Cups washing soda (can be found in the laundry aisle at the supermarket, or you can make it by heating bicarb soda in a casserole dish in the oven at 200C for an hour) 3 bars of soap (preferably homemade soap, or allergy friendly), grated 15 drops Lemon (or another citrus) essential oil This whole process really calls for a food processor. Grate your soap (I use a grating disc in the food processor) and then I pull out the grating disc, put the regular mixing blade in and add 2 cups of the washing soda. Pulse this, and then add the remaining 4 cups of washing soda and the essential oil. Process until the mixture looks fine (no lumps of soap!). Store in an airtight container. I use 2-4Tbsp of this in our 10kg front loader. Use less if you have a smaller machine. DIY Multipurpose Kitchen Spray A glass bottle with a spray head (250ml maple syrup bottles work beautifully) 1 Tsp liquid soap (a natural dish detergent is fine, or you can make your own liquid soap) 10-15 drops essential oil. Citrus is great, but a wide variety can be used for their cleansing properties. Add your liquid soap to the glass jar, then fill almost to the top with water. Add you Essential oils, put the spray nozzle on and shake to mix. So easy! Now you have a non-toxic multipurpose spray for your kitchen. Adhesive/gunk Remover 1/3 C oil (olive, or whatever you have in the kitchen) 1/4 C bi carb soda 10 drops lemon essential oil Mix all ingredients together in a glass jar. To use, try and make sure you’ve peeled what you can off the glass jar, and then spread a layer of this paste over the adhesive and allow to sit for 10-60 minutes. Scrub off in warm soapy water (I often use a scourer). This is a very handy recipe if you like to reuse glass jars and sometimes have a problem removing the labels. Scouring Powder (for pots, pans, BBQ’s, tubs and the like) 1/2 Cup Bicarb Soda 1/4 Cup salt (I grind Himalayan pick salt into powder and use this) 1 1/2 Tbsp Cream of Tartar (optional, but is helpful as a natural bleaching agent) 10 drops Lemon essential oil (optional, helps with degreasing) Combine all ingredients in a jar, preferably a glass jar. To use, sprinkle a teaspoon or so of powder on steel wool or a scrubbing pad and scrub the dirty surface. I’ve used this on a BBQ, kitchen sink and saucepans and it’s been a great help in removing grease etc. Boot/Leather Polish 2Tbsp Beeswax, grated 2Tbsp Shea butter 1/4 Cup Almond Oil 1/4 Cup Castor Oil Tins or flat, wide mouthed jars to store in You will need a thick glass jar, with about a 250ml+ capacity, that you don’t mind being ruined for everything else! Beeswax is difficult to clean off. Place your beeswax and shea butter in the jar and then place the jar in a small saucepan of water. Double boil to melt the wax and oil. Once melted, slowly pour in your almond oil, while stirring. Then slowly pour and stir your castor oil in. Keep this on the heat, being sure not to let it boil for several minutes longer. Now you can pour into your jars/tins and allow to set at room temperature. To use, you can either apply to your leather with a shoe polish brush, or a cloth. Rub into the leather and you’re good to go. Liquid Soap (used in other cleaning recipes, or can be used as a DIY shower gel) 1 bar of soap, preferably homemade or made with natural ingredients. It’s a great way to use up ‘seconds’ soap, or batches that didn’t work out! Please avoid pure coconut oil soap! It sets so hard! Water, preferably rain water or filtered 1tsp glycerine (optional, you’ll find it at the health food store) 1tsp vodka (optional, helps with the texture of the soap) Essential oil for scent (optional) A double boiler, I just use a stainless steel bowl over a saucepan of water Finely grate your soap (food processors make this far easier! Add this soap to your bowl and then add water. How much water depends on how thick you like your liquid soap. 2 Cups of water is a good starting point and you can always add more if you want to. Gently melt this over a medium heat until it looks like you have a syrup. Now is the time to add more water if you want it (the liquid soap often thickens more as it cools). Add your glycerine and vodka if using them, and essential oils if you’d like a scented liquid soap. Store in pump bottles, or old sauce bottles work well too. Air Freshener 3/4 cup (approx, depends on your bottle size) water 1-2Tbsp vodka or pure vanilla extract Essentials oils of choice for scent. I used 4 drops cardamom, 3 drops clove 3 drops cassia and 2 drops ginger to create the Chai Air Freshener blend. So easy…all you do is add your essential oils and vodka/vanilla to your glass bottle (please avoid plastic when using essential oils, a maple syrup bottle is a great size), and then fill almost to the top (leaving room for the displacement the spray nozzle will cause) with water. Give a little shake and its ready to use. Toilet Cleaner There are so many options for non-toxic toilet cleaning. Our favourite so far, has been to get: 1-2 Tbsp citric acid, it’s much more economical to buy in bulk rather than from the supermarket Water Put the citric acid in your jug/kettle and then fill with water. Boil it and then pour the whole lot, slowly, around the insides of the toilet bowl. Now you can scrub as normal. The bonus with this method, is that the citric acid will descale your jug/kettle for you too! Flush the toilet when you’re done. For really stubborn marks you can use the scouring powder, mixed with a little water to make a paste. Apply that to the trouble areas and allow to sit for an hour or so. Scrub off. Window Cleaner 2 cups water (filtered or distilled is best) 2 Tbsp Vinegar (look on the bottle for minimum 5% acetic acid) 10 drops essential oil of choice (citrus oils are great for grease removal) Combine in a spray bottle, preferably tinted glass (essential oils don’t like light and eat away at plastic!). Use just as you would a commercial window cleaner. |
AuthorHi, my name is Racheal and I write the blog for Simple Living Toowoomba. Thanks for joining us on this journey to living a simpler life and encouraging others to do the same. Archives
May 2022
Categories
All
|
 RSS Feed
