|
After 10 years of running workshops we have decided to finish up this wonderful group. It has been an incredible journey. We have made wonderful friendships, learnt so many amazing skills and developed a special simple living community. But, as with everything, there comes a time to finish up. I would love to sincerely thank Michele for taking on the mantle of coordinator this past couple of difficult years. She has done an incredible job keeping the group going. Many thanks to the numerous presenters over the years and most importantly many thanks to all those people who have attended workshops and supported our group. May you all continue to live simply. Margy
0 Comments
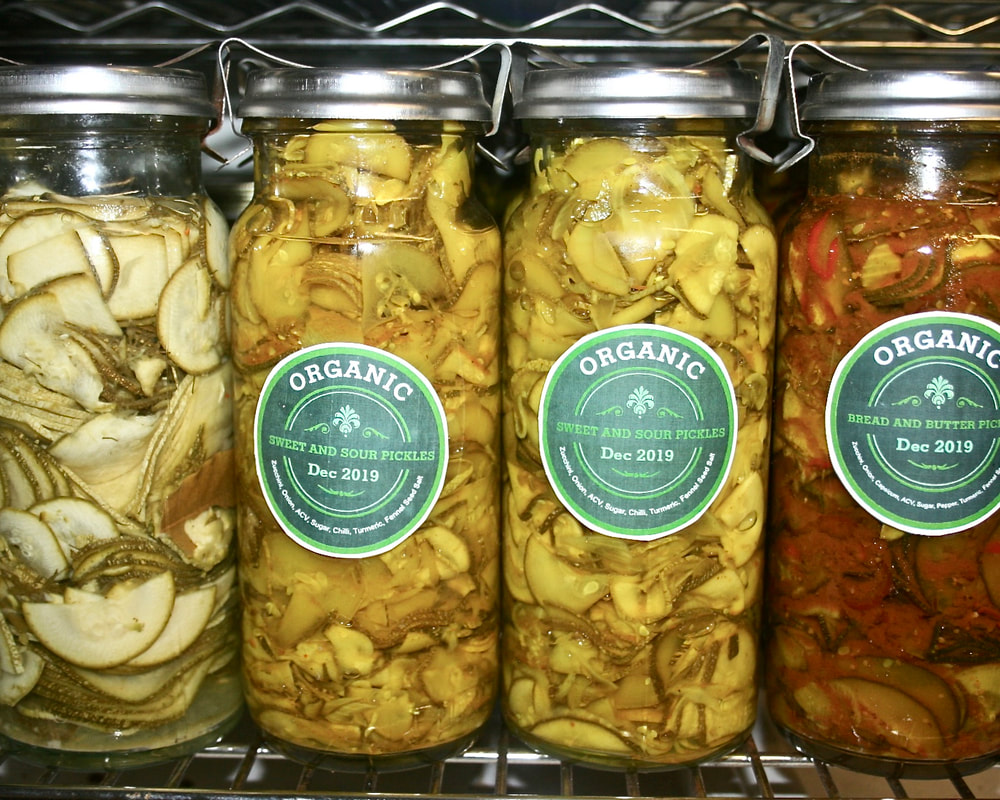
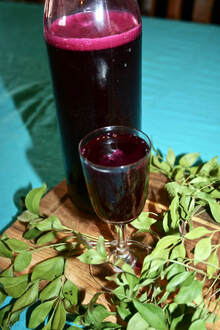 Lacto-fermentation Workshop Notes: What is Lacto-fermentation? Lacto-fermentation is a method of food preservation in which a brine is used to create an anaerobic (no oxygen), acidic environment in which pathogens such as botulism, cannot survive. “Lactic acid is a natural preservative that inhibits putrefying bacteria. Starches and sugars in vegetables and fruits are converted into lactic acid by the many species of lactic-acid-producing bacteria. These lactobacilli are ubiquitous, present on the surface of all living things and especially numerous on leaves and roots of plants growing in or near the ground.” Nourishing Traditions, by Sally Fallon, p89 Lacto-fermentation has been utilised right throughout the history of mankind as a viable method of keeping produce fresh and edible for longer. It also retains the nutrients of the produce, as there’s no cooking/heating involved and the process is simple enough that anyone can give it a go with minimal equipment. This is such a sustainable method of food preservation, as it does not require any gas or electricity to produce (unless you choose to slice or blend with an electrical appliance). What Equipment/Supplies are Needed? Good quality knife or food processor. If I’m making kraut or fermented dill pickles, it’s the food processor I use, as it’s quick and produces evenly sliced vegetables. But a sharp knife (or even a mandolin) would work fine. A tamping or pounding tool. We have blender tampers that do the job, but you can buy specialised pounding tools for fermenting if desired. Glass or ceramic vessels with lids. Again, there are specialised fermenting jars, crocks and lids with air-locks on them. But you can definitely keep it simple and repurpose glass jars from the supermarket, or your slow-cooker crock, to get started. I usually use vacola preserving jars. Mason jars are excellent too, and you can find custom air-lock lids (such as Pickle Pipes) online that fit the mason jars. You don’t have to use a lid with an air-lock. I usually don’t, but it means your ‘brew’ will require a little more attention, as you will need to manually ‘burp’ out the gasses about once a day (simply lifting/unscrewing the lid of each jar, and then securing it again. If you keep your brew somewhere that you will see it often, such as the kitchen bench, this process is much easier to manage. Why not plastic? Technically, you can use plastic containers, but plastic is easily scratched and can harbour foreign bacteria. Plastic also can affect the flavour of your vegetables. Fermentation weights. Submerged vegetables stay free from mould and pathogens. Vegetables that float above the surface however, can spoil. Our ferments are always in the kitchen and in open view, so I can keep on top of this and don’t worry about fermentation weights, but if you want the peace of mind, get some fermentation weights. Objects that are clean and free of glues and harsh chemicals work well. Some use little plastic bags of water to keep the vegetables submerged, but this means you are introducing plastic to the brew…which many people prefer to avoid. Salt or whey. Salt is able to prevent the proliferation of putrefying bacteria for a few days, until sufficient lactic acid is produced to preserve the vegetables for many months. Whey reduces, or sometimes even eliminates the need for salt and results in consistently successful pickling. Use sea salt or Himalayan salt; avoid table salt or processed salts. If using whey, use it fresh and avoid commercial concentrated whey or dried whey. Water. Go for pure or filtered water. Avoid treated tap water, it will affect the end result of your ferment. Recipes: Elderflower Fizz (beverage), from Linda Brennan’s ‘A Delicious Bunch, Growing and Cooking With Edible Flowers’ Makes 4.5L (GF, DF, V) 6 large heads of elderflowers (shaken to remove any bugs) 4.5L filtered water (best not to use treated tap water, as it can affect the fermenting process) 2 lemons, sliced 750g sugar 2 Tbsp apple cider vinegar 1/2 tsp champagne yeast (optional, and available at brewing supply shops. Or use 1/2 tsp of brewers yeast) Bottles to hold the finished product Select young heads of flowers (without brown flowers). Put the water in a large boiler saucepan with a lid. Add the flower heads and lemons. Put the lid on and leave for 36 hours. Strain the liquid through a piece of clean muslin or cheesecloth into a large bowl or pan (I use a glass drinks dispenser). Add the sugar, vinegar, and yeast if using and stir to dissolve. You can either pour this into bottles (leaving 4cm headspace for expansion) now, to ferment, or if using a large glass drinks dispenser like I do, just sit the lid on top, but don’t seal tightly. You’ll see bubbles form over the next day or so, and this indicates that fermentation has started. Depending on the season, the bubbles slow down after about a week (slower in winter). At this stage, screw the lid on tightly . Keep a close eye on the brew, if they are plastic and are expanding, loosen the cap/lid to allow some of the bubbles to escape. Leave another 3-5 days before refrigerating. It keeps for weeks in the fridge. Serve full strength, or with a little mineral water. The longer you keep it, the less sweet it will be, as the yeasts use the sugar. Bougainvillia Switzel (beverage) from Linda Brennans ‘A Delicious Bunch, Growing and Cooking With Edible Flowers’ p52 4 cups bright, fresh, Bougainvillia bracts 4 cups filtered water 3/4 c white sugar 4 slices of lemon 1c fresh lemon verbena flowers and leaves OR lemon myrtle leaves 1c fresh pineapple pieces 1/2c unpasteurised apple cider vinegar Rinse the bougainvillea to remove pollen before adding them and the water to a large saucepan. Bring to the boil and simmer gently until the water takes on the colour of the bracts. Remove from the heat and strain out the bracts, retaining the liquid. Return the coloured liquid to the pot and add the sugar. Stir to dissolve then reheat to boil 1 minute to create a syrup. Turn off the heat and add the lemon slices, leaves and pineapple. Mash them with a potato masher to release the flavours of the fruit. Allow it to infuse in the syrup for 5 minutes. Strain the liquid and keep it, but discard the solids. Cool to room temperature. Once cooled, add the vinegar and leave on the bench, covered, for 8-12 hours to begin fermentation. This will consume some of the sugar and give you a very slightly effervescent drink. Pour into bottles and refrigerate. To serve, add ice and chopped seasonal fruits to a glass. Pour in a little switzel concentrate, as you would for cordial. Dilute with soda or mineral water. Beet Kvass (Beverage), from EatingEuropean blog Ingredients • 9 Organic Beets medium size, peeled, cut into 1/2 inch slices • 8 cups Water filtered, boiled and cooled off • 2 tbsp Himalayan Salt • 1 bulb Garlic all cloves peeled • 1 tbsp Allspice • 1 tbsp Black Peppercorn • 10 Bay leaves Instructions • Boil the water with Himalayan salt and cool it off. • Peel the beets and garlic and assemble them in the stone pot or glass jar. • Layer beets, garlic and some spices, then repeat until all ingredients are used. • Pour over the water; If the beets are coming above the water surface, add plate to the pot to keep them down; • Cover the pot and leave it for five days on a counter; • Check for white film on the surface daily and if it forms, remove it with wooden spoon. It is harmless. • After 5 days, strain the kvass and pour into the glass jars or bottles. Refrigerate for up to a few weeks. Notes It is very important that the water is boiled and the pot or jar and all utensils that you will be using for kvass are disinfected with the boiling water as well. It will ensure a proper fermentation and reduce the risk of introducing unwanted bacteria into the mixture. Use gloves, clean knifes and board to prepare beets and garlic; Use clear wooden spoon to remove white film from the surface daily; You can gently stir the kvass daily as well. Lactofermented Dill Pickles by Culturesforhealth.com The so-called "kosher" pickle is not necessarily kosher in the sense that it complies with Jewish food laws. It is called kosher because of its flavor profile made popular by New York’s Jewish pickle makers, known for their natural salt-brined pickles heavily seasoned with dill and garlic. So any pickle that is seasoned in the same fashion is referred to as a kosher dill. Fermented pickles have been around for hundreds of years and we have the best recipe for you to follow to start making your own fermented pickles. INGREDIENTS: • 5 Tbsp. sea salt • 2 quarts chlorine-free water • 4-6 grape, oak, horseradish, or bay leaves • 6-9 cloves garlic, peeled • 2 large heads of dill • Spices to taste: black peppercorns, red pepper flakes, mustard seeds, etc. (Secret ingredient: for an extra bite, add a few strips of fresh horseradish to the spice mix!) • Enough pickling cucumbers to fill a ½-gallon jar INSTRUCTIONS: 1 Make a brine by dissolving 5 tablespoons sea salt in 2 litres of chlorine-free water. (Note: this recipe will possibly make more than what is needed, you may save extra brine to be used in future ferments.) 2 In a half-gallon jar add a couple of the tannin-containing leaves, a few cloves of garlic, the heads of dill, and ⅓ of the spices. 3 Pack half of the cucumbers tightly on top of the spices. (The longest ones work best at the bottom.) 4 Repeat a layer of leaves, garlic, and spices. Add another tightly packed layer of cucumbers and top them off with more garlic and spices. 5 Pour the brine over the pickles, leaving 1-2 inches of headspace. Place another tannin-containing leaf on top of the pickles as a cover between the pickles and the surface of the brine. Use a fermentation weight to keep the pickles under the liquid, if necessary. Cover the jar with a tight lid, airlock lid, or coffee filter secured with a rubber band. 6 Ferment at room temperature (15-21°C is preferred) until desired flavour and texture are achieved. If using a tight lid, burp daily to release excess pressure. The brine should turn cloudy and bubbly, and the pickles should taste sour when done. 7 Eat right away, or store in a refrigerator or root cellar for months and enjoy them all winter long. LACTO-FERMENTED BEETS Recipe by Jody Gowans Fermentation time: 2 - 4 weeks INGREDIENTS Fresh beets (red or golden)- cleaned (peeling optional) Brine :1 litre water filtered water + 20 grams (approximately 4.5 teaspoons) salt (non-iodized) Bay leaf Flavourings (optional): Garlic clove, ginger, fresh herbs Glass fermentation container Fermentation weight DIRECTIONS Wash and trim beets of greens. Leave skins on if you like. Cut beets into slices or cubes, as desired. Place beets, bay leaf and optional flavourings in the fermentation container, leaving a 1" space to the top of the neck of the jar. Fill with brine, leaving a 1" space to the top of the neck of the jar Add fermentation weight (if necessary). Close jar. Leave at room temperature (ideally 55-75 F (18-22 C) ) for 2-4 weeks. Transfer to the refrigerator for storage. From Saturday 13/2/21 Class
Here's more info on preparing herbal tinctures: https://blog.mountainroseherbs.com/guide-tinctures-extracts Homemade Health and Beauty
DIY Sunblock 1/2 Cup Almond or Olive Oil (Natural SPF 5) 1/4 Cup Coconut Oil (Natural SPF 4-6) 1/4 Cup Beeswax 2 Tbsp Zinc Oxide Powder (Natural SPF 2-20 depending on quantity) 2 Tbsp Shea butter (SPF 4-6) Essential oils (not citrus based!) for scent
Activated Charcoal Toothpaste 3Tsp Coconut Oil 2 capsules of Activated Charcoal 1 Tbsp Bicarb soda 1Tbsp Bentonite clay 2-5 drops peppermint essential oil (optional) There are a few ways to do this. You can add all ingredients to a saucepan and gently melt, stirring until immersed. Then shut off the heat and pour into your chosen container (glass is best if using essential oils). Or you can get a small glass jar and gently melt the ingredients via double boiling, in a small saucepan. As the mixture cools, stir it now and then to stop the oil from separating. To use, spoon a little toothpaste (size of a pea or smaller) onto your brush and brush teeth as normal. Oil Pulling Oil pulling is nothing new, but has been gaining popularity recently as people look for non-toxic ways to deal with dental cavities/gingivitis etc. I personally have used this method when I’ve felt a cavity causing trouble, and it works wonders. Various oils can be used, but coconut oil is especially good as its antioxidant, skin healing and antimicrobial properties really get to work for you. 2 Tbsp oil, preferably coconut Put the oil in your mouth and gently swish for about 20 minutes. If that’s too long for you (it is a long time to go without talking, especially if you’re a mother!) then even 10 minutes will be very beneficial. Afterwards, spit the oil into the bin (not sown the sink!) or into the garden. Feel the difference? Its so cleansing. Magnesium Bath Salts Magnesium is something the majority of the population are said to be deficient in, and it’s so important for reducing inflammation, promoting oxygenation and blood flow and stimulating nerve and muscle function. It’s also known as a laxative. You can absorb this mineral transdermally by taking a magnesium bath. 2 Cups Epsom salts (available at garden stores, or online from places like Blants) 4-8 drops Lavender essential oil (optional, to make the bath a more relaxing experience) Rose or lavender buds (optional, if you’re willing to have them go down your plug hole!) Mix the ingredients together in a bowl, pour into a glass jar and seal. Use 1/2 cup of the mix in each bath and try to bathe in this for 20 mins. Oil Cleansing Method (Facial) After all the years of commercials promoting ‘oil free’ skincare, it’s kind of strange to start learning about how beneficial oils actually are for your skin! But once you learn some of these methods/recipes, you can stop buying skincare products. This oil cleanser is wonderful for getting the glow back into your skin, dealing with blackheads and restoring skin. It also removes makeup effectively, for those who wear it. “Fact: Oil dissolves oil. One of the most basic principals of chemistry is that “like dissolves like.” The best way to dissolve a non-polar solvent like sebum/oil, is by using another non-polar solvent similar in composition: Other oils. By using the right oils, you can cleanse your pores of dirt and bacteria naturally, gently and effectively, while replacing the dirty oil with beneficial ones extracted from natural botanicals, vegetables and fruit that heal, protect and nourish your skin. When done properly and consistently, the OCM can clear the skin from issues like oily skin, dry skin, sensitive skin, blackheads, whiteheads and other problems caused by mild to moderate acne–while leaving your skin healthy, balanced and properly moisturized.” Taken from acne.com You will need: 2/3 C Olive Oil (preferably good quality) 1/3 C Castor Oil (available at chemists and probably health food store…or online) A clean face washer Water as hot as you can stand to have on your face. I find our hot water tap provides a decent temperature. This recipe can be adapted if it doesn’t suit your skin. Some people with naturally dry skin may need more olive oil and less castor oil, or vice versa if you have especially oily skin. Mix your oils in a glass jar. When ready to cleanse, pour about a 20 cent piece size portion of the oil blend into your palm and massage across your hands, and then onto your face. Gently, in a circular motion, rub the oil into your skin, focusing on areas where you have trouble with blackheads etc. Massage for 1-2 minutes. Now to steam it off! Get your washer under the hot water, make sure it’s fully wet then wring it out and drape over you face. Let it sit there for about 1 minute, or until it has cooled. Repeat 1-2 times more, washing out the washer with fresh hot water each time. You can gently pat excess oil off if needed, but a small residue on your skin is fine to leave. Moisturise if desired (I use a homemade moisturising oil for this). NOTE: When you start oil cleansing, it can take a week or so for your skin to adjust. At first it might break out as impurities are cleansed! Oil Moisturiser Making your own moisturising oil is simple and customisable. I use a fractionated coconut oil base (doesn’t solidify when the weather turns cold), but other oils like almond, avocado etc are great too. Start with a glass bottle, preferably tinted (to protect the essential oils from light). I use a 10ml rollerball bottle. Larger bottles are fine too if you’d prefer to make a larger batch. In a 10ml bottle I’ll fill it about 1/3 full with pure essential oils like Sallubelle (doTerra’s beauty blend) or a custom blend with skin healing/boosting oils such as lavender, sandalwood, geranium, helichrysum, cedar wood, and roman chamomile. Please don’t use any citrus oils, which are photosensitive, unless you will only be using your moisturiser at night. Citrus oils on the skin should not be exposed to sunlight for at least 12 hours. After your essential oils are in, fill the remainder of the bottle with your carrier/base oil. To use: This depends on what sort of bottle you have used. A rollerball bottle can be rolled over the face, then the oil massaged gently in. A bottle with an orifice reducer can be very slow to use, but if you are using one, drip out about a 10 cent piece sized portion of oil into your palm and dab onto your face then massage in. Solid Perfume Much like making a scented lip balm, and so conveniently carried in your hand bag! These also make great little gifts. 4Tbsp Beeswax 2Tbsp jojoba oil (can use almond oil or another plant based oil instead) 50 drops essential oil (customise to suit your tastes) Containers for the perfume. This could be mini-tins, old Avon jars, lip balm tubes, silicone chocolate moulds. Be aware that in high heat (summer in the car for example) the solid perfume can melt and make a mess. So containers that seal well are a good idea! In a small glass jar, double boil your beeswax until just melted, and then incorporate your jojoba oil. Pull this off the heat. It should be warm, but not excessively hot, this is important in order not to damage the essential oils that are about to be added. Add your essential oils and mix in well. Now pour into your chosen containers and allow to set. Lip Balm 2Tbsp Cocoa Butter 2Tbsp Beeswax 1Tbsp almond oil OR olive oil OR jojoba oil Up to 30 drops essential oil (optional, but great for adding extra moisturising /healing properties) Lip balm pots or tubes (available online) Once again, you’ll need a small glass jar to double boil your cocoa butter and beeswax until melted. Next, shut off the heat and add your almond oil. Now mix in your essential oils. For dry winter lips, oils like lavender and geranium are great. Vanilla oleoresin is beautiful for a warm yummy scent. Or oils like peppermint and wild orange create a vibrant, energetic scent. Pour into your tubes/pots and allow to set. Oil Perfume Perfume the way it used to be…there’s a 200 year old perfumery in India that still makes traditional perfume from rose, sandalwood and other health-promoting oils. Synthetic perfumes, on the other hand, are alcohol based and often contain hormone disruptors, allergens and neurotoxins. Much like the oil moisturiser, we start with a rollerball bottle and will use a base of fractionated coconut oil, or another oil with low-scent. Essential oils are used to create the fragrance. To make a blend, its a great idea to start with a perfume blending chart that details which oils are top, middle and base notes. Top notes are the first scents that strike you when you open a bottle of perfume, but they’re also the shortest-lived. Whereas base notes take a little longer for you to register the scent, but they also linger long. Start by checking out your perfume blending chart (should be included with these recipes). What type of scents do you like? What categories do they fit into? Pick a base note (or two) that you like and drip it into your rollerball bottle. Then find a middle note or so that compliments the base. Then add your top notes. The scent will mingle and slightly change overnight as the oils settle together. When you are happy with the blend, fill the remainder of the bottle with your carrier oil and seal tightly. To use, just roll on. Please avoid contact with eyes! If for any reason you get essential oils in your eyes, use olive oil or another vegetable based oil, dripped into your eye to clean the essential oil out and relieve the pain. Water/milk won’t work! Insect Repellent There are a few ways to do this, depending on whether you prefer a water or oil based repellent. An oil based concoction will absorb into the skin and possibly last longer…and moisturise your skin at the same time. A water based blend works well in a spray bottle, but I find tends to disappear to quickly. But for anyone worries about getting oil on their clothes, a water based repellent will be safer. Water Based Repellent 1/2 cup water (or vinegar works also) 1tsp vegetable glycerine (optional, but great for blending) 50 drops total of essential oils. Examples of insect repelling EO’s are citronella, lemongrass, lavender, thyme, rosemary, geranium, clove and spearmint. Oil Based Repellent 1/4 cup carrier oil such as olive, almond or avocado oil 50-60 drops total of essential oils Green Cleaning Homemade Laundry powder 6 Cups washing soda (can be found in the laundry aisle at the supermarket, or you can make it by heating bicarb soda in a casserole dish in the oven at 200C for an hour) 3 bars of soap (preferably homemade soap, or allergy friendly), grated 15 drops Lemon (or another citrus) essential oil This whole process really calls for a food processor. Grate your soap (I use a grating disc in the food processor) and then I pull out the grating disc, put the regular mixing blade in and add 2 cups of the washing soda. Pulse this, and then add the remaining 4 cups of washing soda and the essential oil. Process until the mixture looks fine (no lumps of soap!). Store in an airtight container. I use 2-4Tbsp of this in our 10kg front loader. Use less if you have a smaller machine. DIY Multipurpose Kitchen Spray A glass bottle with a spray head (250ml maple syrup bottles work beautifully) 1 Tsp liquid soap (a natural dish detergent is fine, or you can make your own liquid soap) 10-15 drops essential oil. Citrus is great, but a wide variety can be used for their cleansing properties. Add your liquid soap to the glass jar, then fill almost to the top with water. Add you Essential oils, put the spray nozzle on and shake to mix. So easy! Now you have a non-toxic multipurpose spray for your kitchen. Adhesive/gunk Remover 1/3 C oil (olive, or whatever you have in the kitchen) 1/4 C bi carb soda 10 drops lemon essential oil Mix all ingredients together in a glass jar. To use, try and make sure you’ve peeled what you can off the glass jar, and then spread a layer of this paste over the adhesive and allow to sit for 10-60 minutes. Scrub off in warm soapy water (I often use a scourer). This is a very handy recipe if you like to reuse glass jars and sometimes have a problem removing the labels. Scouring Powder (for pots, pans, BBQ’s, tubs and the like) 1/2 Cup Bicarb Soda 1/4 Cup salt (I grind Himalayan pick salt into powder and use this) 1 1/2 Tbsp Cream of Tartar (optional, but is helpful as a natural bleaching agent) 10 drops Lemon essential oil (optional, helps with degreasing) Combine all ingredients in a jar, preferably a glass jar. To use, sprinkle a teaspoon or so of powder on steel wool or a scrubbing pad and scrub the dirty surface. I’ve used this on a BBQ, kitchen sink and saucepans and it’s been a great help in removing grease etc. Boot/Leather Polish 2Tbsp Beeswax, grated 2Tbsp Shea butter 1/4 Cup Almond Oil 1/4 Cup Castor Oil Tins or flat, wide mouthed jars to store in You will need a thick glass jar, with about a 250ml+ capacity, that you don’t mind being ruined for everything else! Beeswax is difficult to clean off. Place your beeswax and shea butter in the jar and then place the jar in a small saucepan of water. Double boil to melt the wax and oil. Once melted, slowly pour in your almond oil, while stirring. Then slowly pour and stir your castor oil in. Keep this on the heat, being sure not to let it boil for several minutes longer. Now you can pour into your jars/tins and allow to set at room temperature. To use, you can either apply to your leather with a shoe polish brush, or a cloth. Rub into the leather and you’re good to go. Liquid Soap (used in other cleaning recipes, or can be used as a DIY shower gel) 1 bar of soap, preferably homemade or made with natural ingredients. It’s a great way to use up ‘seconds’ soap, or batches that didn’t work out! Please avoid pure coconut oil soap! It sets so hard! Water, preferably rain water or filtered 1tsp glycerine (optional, you’ll find it at the health food store) 1tsp vodka (optional, helps with the texture of the soap) Essential oil for scent (optional) A double boiler, I just use a stainless steel bowl over a saucepan of water Finely grate your soap (food processors make this far easier! Add this soap to your bowl and then add water. How much water depends on how thick you like your liquid soap. 2 Cups of water is a good starting point and you can always add more if you want to. Gently melt this over a medium heat until it looks like you have a syrup. Now is the time to add more water if you want it (the liquid soap often thickens more as it cools). Add your glycerine and vodka if using them, and essential oils if you’d like a scented liquid soap. Store in pump bottles, or old sauce bottles work well too. Air Freshener 3/4 cup (approx, depends on your bottle size) water 1-2Tbsp vodka or pure vanilla extract Essentials oils of choice for scent. I used 4 drops cardamom, 3 drops clove 3 drops cassia and 2 drops ginger to create the Chai Air Freshener blend. So easy…all you do is add your essential oils and vodka/vanilla to your glass bottle (please avoid plastic when using essential oils, a maple syrup bottle is a great size), and then fill almost to the top (leaving room for the displacement the spray nozzle will cause) with water. Give a little shake and its ready to use. Toilet Cleaner There are so many options for non-toxic toilet cleaning. Our favourite so far, has been to get: 1-2 Tbsp citric acid, it’s much more economical to buy in bulk rather than from the supermarket Water Put the citric acid in your jug/kettle and then fill with water. Boil it and then pour the whole lot, slowly, around the insides of the toilet bowl. Now you can scrub as normal. The bonus with this method, is that the citric acid will descale your jug/kettle for you too! Flush the toilet when you’re done. For really stubborn marks you can use the scouring powder, mixed with a little water to make a paste. Apply that to the trouble areas and allow to sit for an hour or so. Scrub off. Window Cleaner 2 cups water (filtered or distilled is best) 2 Tbsp Vinegar (look on the bottle for minimum 5% acetic acid) 10 drops essential oil of choice (citrus oils are great for grease removal) Combine in a spray bottle, preferably tinted glass (essential oils don’t like light and eat away at plastic!). Use just as you would a commercial window cleaner. https://birdsongmarketgarden.com.au/shop-produce/bone-broth-workshop-weds-june-19th-1pm-3pm-at-birdsong/
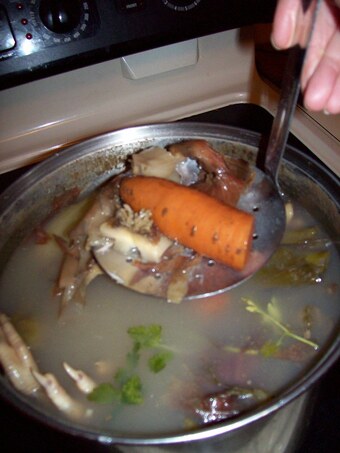
Come visit the Birdsong kitchen and learn how to make organic bone broth! Bone broth is the perfect way to extract minerals like calcium, magnesium, phosphorus, silicon and sulphur from animal bones and fresh vegetables/herbs and transfer them into a nutritious liquid that allows these minerals to be highly bio-available to your body. It is also a great source of collagen, proline, glycine and glutamine. Well talk about sourcing quality ingredients, how to prepare, storing (using methods such as pressure canning, bouillon, freezing) and how to use bone broth. The workshop will include a demo on pressure canning, info/recipe/sourcing sheet, take home veg/herb pack to get you started and of course a demo on making the broth itself. Use the above link for more info and to book in and pay. Soap Making Workshop with Racheal from Birdsong Market Garden:
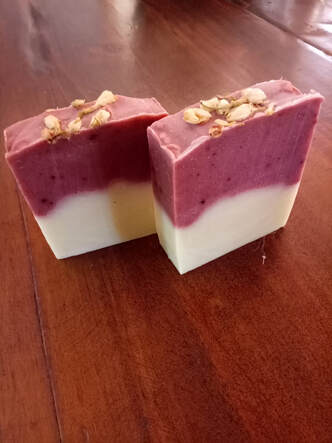
Tickets: https://www.stickytickets.com.au/84906 Facebook Event: https://www.facebook.com/events/408806493230724 Suanne is running these Workshops in April/May: DIY Beeswax Wrap Making: Facebook Event: https://www.facebook.com/events/974895712714654 Tickets: https://www.stickytickets.com.au/84899 Food Photography: Tickets: https://www.stickytickets.com.au/84906 Facebook Event: https://www.facebook.com/events/886085015056245 For more info and to book in and pay, visit the above links :-)
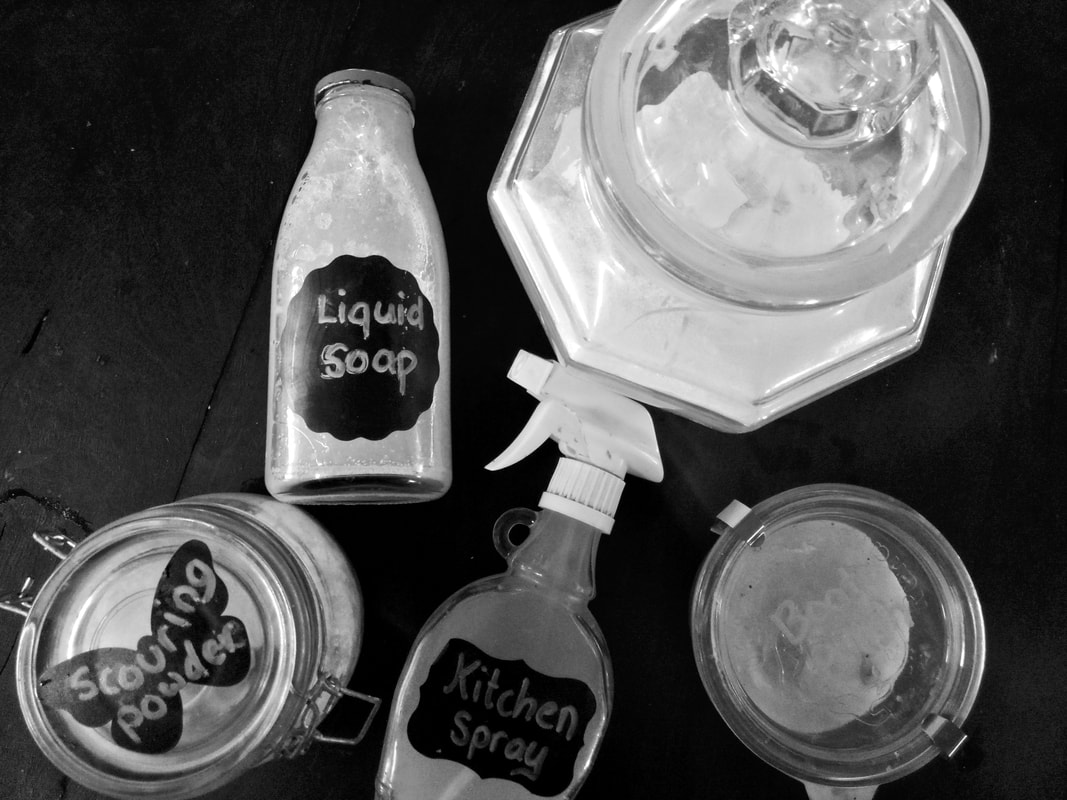
Come and learn how to detox your cleaning regime with homemade alternatives to commercial products…using simple, often inexpensive ingredients. In this workshop, which will run for approximately 1.5-2 hours, I’ll show you how to make your own laundry powder, kitchen spray, gunk/adhesive remover, scouring powder, boot polish, liquid soap, air freshener, toilet cleaner and window cleaner. Cost: $35. Payment can be made by selecting and buying this workshop online at birdsongmarketgarden.com.au/2018/09/18/birdsong-green-cleaning-class-wednesday-26th-september-10am/ . This will automatically book you in. Price includes a take-home kit with some ingredients to get you started! Details: Wednesday 26th September, 10am at Birdsong Market Garden, 118 Boundary St, Cranley, 4350 Bookings Essential. PS. For those who love the idea of homemade, local, non-toxic cleaning products, but aren’t keen on making them themselves, check out Green Dandelion (online). Suanne makes and sells these products. https://goinggreyandslightlygreen.blogspot.com/2018/09/a-pretty-petals-workshop.html
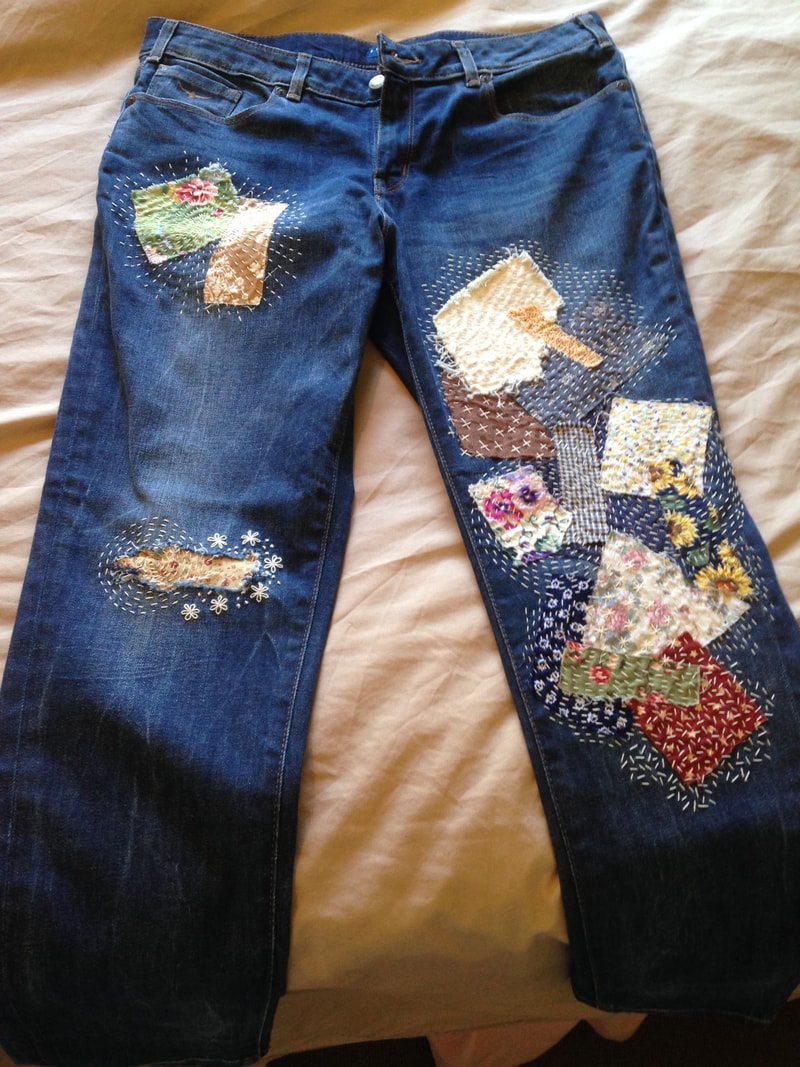
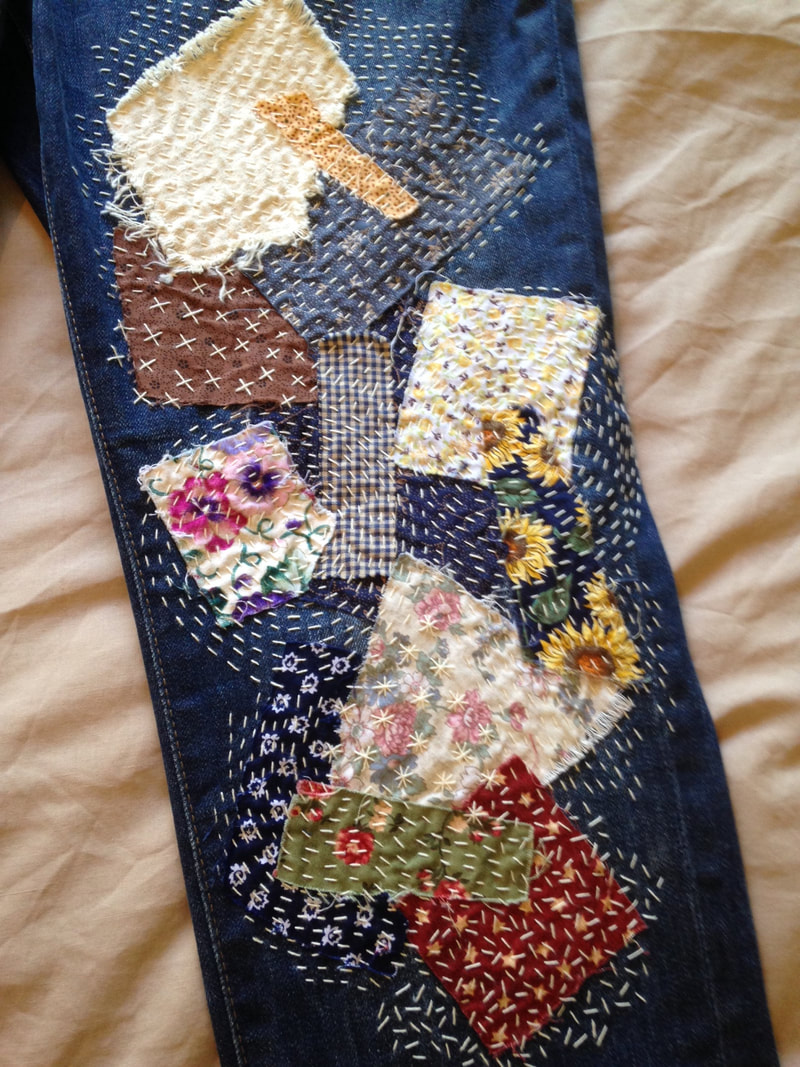
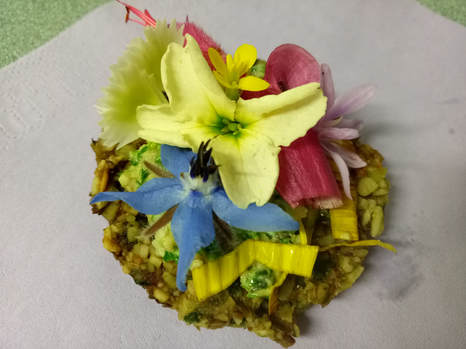
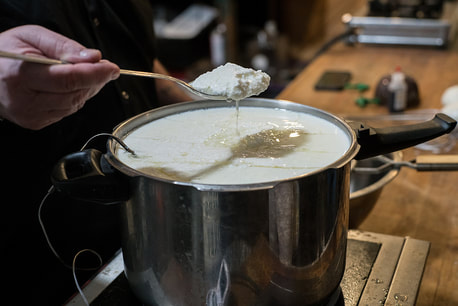
First of all, the above link is to Michele's blog on SLT's September workshop, well timed with the carnival of flowers this month in Toowoomba! Linda Brennan, author of "A Delicious Bunch" came along and inspired us all with her edible flowers and recipes...and tips on organic gardening. I was very impressed by Linda. She and her husband have even gone to the effort of doing a green house flip on their home, making it eco friendly. She obviously LOVES gardening and eating of her produce. I noticed other little things too, like the fact that Linda wasn't using the latest and greatest kitchen equipment, she was even being green in that department, using her perfectly functional old-style food processor. The above picture is a sunflower seed biscuit, decorated with an array of edible flowers, that we assembled at the workshop. Wouldn't they make beautiful high tea snacks? Beautiful and very wholesome. I believe our next workshop will be with The Source Wholefoods, sharing with us ways to go green and make whole food/organic eating more affordable. Keep an eye out for details! To be the first to know, just email us on the "contact" page and your email can be added to the mailout list. Wow, it's been a while since I updated the blog! Sorry about that. Winter has been busier in the market garden than expected, so time has been short. SLT's Recycled Fabric Workshop in June looked to be inspiring, and Michele blogged about it here. Yesterday we held the Cheese Making workshop, with the focus on Feta and Mozzarella. For those who've never tried making cheese, most cheeses take weeks or even months to mature/age, so we had to stick to 'fresh' cheeses that can be made in a matter of hours rather than weeks! Our teacher, Patricia, is a science teacher with a emphasis on microbiology, so she was able to explain a little of what's going on with the bacterial process in cheese making. We were able to sample these lovely fresh cheeses and there will be some class notes coming, which I plan to post when I get them :-) Patricia recommends getting cheesemaking supplies from GreenLivingAustralia While we've just mentioned recycling fabric, has anyone heard of The Clothesline second hand clothing store in Toowoomba? In our home, we're big fans of op shopping and second hand just-about-everything, so I was surprised to find that there's a second hand clothing store that's been going for 2.5 years and yet we'd never heard of it!
The Clothesline is at 2 Mann St (next to Hanna's department store). They specialise in used upmarket and designer brand clothes. Their prices are higher than a regular op shop, but then they're not actually an op shop. They buy as-new designer clothing from people who no longer need them. So for anyone who wants quality used clothing, it's definitely worth a visit. And with that in mind, their prices are excellent for the quality of the clothing. I bought a gorgeous pair of girls printed trousers and the cutest girls clogs I've ever seen at $8.50 each. Both were as new and obviously would have been quite pricey new. I will point out that parking is a little bit of an issue. The Clothesline have a tiny car park right next to their store, but its only got about 3 spaces. You can park at Hanna's if you plan to go in there too (because you need a token from in the store to be able to exit that carpark). I parked at Toyota since they have a huge car park with plenty of space available. Not sure if that's allowed.... So if you get a chance, it's worth checking out. |
AuthorHi, my name is Racheal and I write the blog for Simple Living Toowoomba. Thanks for joining us on this journey to living a simpler life and encouraging others to do the same. Archives
May 2022
Categories
All
|
Photos used under Creative Commons from bjpcorp, tdlucas5000, benjaflynn, Swallowtail Garden Seeds, miheco, Calvine Wu, Barney A Bishop, FrauBucher, French Tart, Mullica, kevinzim, amslerPIX, Dainis Matisons, shock264, Aaron Myszka, Mariposas Furniture, Simon Matzinger, eosdude, yourbestdigs, Rorals, goblinbox_(queen_of_ad_hoc_bento), Erin Stoodley, ekosaint, amy.gizienski, Tatters ❀, Jenn Durfey, brianfagan, imkareneborter, Wheeler Cowperthwaite, roseannadana, wuestenigel, Ole Husby, jinkemoole, laureltopias, Larry1732


 RSS Feed
