What is Lacto-fermentation?
Lacto-fermentation is a method of food preservation in which a brine is used to create an anaerobic (no oxygen), acidic environment in which pathogens such as botulism, cannot survive.
“Lactic acid is a natural preservative that inhibits putrefying bacteria. Starches and sugars in vegetables and fruits are converted into lactic acid by the many species of lactic-acid-producing bacteria. These lactobacilli are ubiquitous, present on the surface of all living things and especially numerous on leaves and roots of plants growing in or near the ground.” Nourishing Traditions, by Sally Fallon, p89
Lacto-fermentation has been utilised right throughout the history of mankind as a viable method of keeping produce fresh and edible for longer. It also retains the nutrients of the produce, as there’s no cooking/heating involved and the process is simple enough that anyone can give it a go with minimal equipment.
This is such a sustainable method of food preservation, as it does not require any gas or electricity to produce (unless you choose to slice or blend with an electrical appliance).
What Equipment/Supplies are Needed?
Good quality knife or food processor. If I’m making kraut or fermented dill pickles, it’s the food processor I use, as it’s quick and produces evenly sliced vegetables. But a sharp knife (or even a mandolin) would work fine.
A tamping or pounding tool. We have blender tampers that do the job, but you can buy specialised pounding tools for fermenting if desired.
Glass or ceramic vessels with lids. Again, there are specialised fermenting jars, crocks and lids with air-locks on them. But you can definitely keep it simple and repurpose glass jars from the supermarket, or your slow-cooker crock, to get started. I usually use vacola preserving jars. Mason jars are excellent too, and you can find custom air-lock lids (such as Pickle Pipes) online that fit the mason jars.
You don’t have to use a lid with an air-lock. I usually don’t, but it means your ‘brew’ will require a little more attention, as you will need to manually ‘burp’ out the gasses about once a day (simply lifting/unscrewing the lid of each jar, and then securing it again. If you keep your brew somewhere that you will see it often, such as the kitchen bench, this process is much easier to manage.
Why not plastic? Technically, you can use plastic containers, but plastic is easily scratched and can harbour foreign bacteria. Plastic also can affect the flavour of your vegetables.
Fermentation weights. Submerged vegetables stay free from mould and pathogens. Vegetables that float above the surface however, can spoil. Our ferments are always in the kitchen and in open view, so I can keep on top of this and don’t worry about fermentation weights, but if you want the peace of mind, get some fermentation weights. Objects that are clean and free of glues and harsh chemicals work well. Some use little plastic bags of water to keep the vegetables submerged, but this means you are introducing plastic to the brew…which many people prefer to avoid.
Salt or whey. Salt is able to prevent the proliferation of putrefying bacteria for a few days, until sufficient lactic acid is produced to preserve the vegetables for many months. Whey reduces, or sometimes even eliminates the need for salt and results in consistently successful pickling.
Use sea salt or Himalayan salt; avoid table salt or processed salts. If using whey, use it fresh and avoid commercial concentrated whey or dried whey.
Water. Go for pure or filtered water. Avoid treated tap water, it will affect the end result of your ferment.
Recipes:
Elderflower Fizz (beverage), from Linda Brennan’s ‘A Delicious Bunch, Growing and Cooking With Edible Flowers’
Makes 4.5L (GF, DF, V)
6 large heads of elderflowers (shaken to remove any bugs)
4.5L filtered water (best not to use treated tap water, as it can affect the fermenting process)
2 lemons, sliced
750g sugar
2 Tbsp apple cider vinegar
1/2 tsp champagne yeast (optional, and available at brewing supply shops. Or use 1/2 tsp of brewers yeast)
Bottles to hold the finished product
Select young heads of flowers (without brown flowers). Put the water in a large boiler saucepan with a lid. Add the flower heads and lemons. Put the lid on and leave for 36 hours.
Strain the liquid through a piece of clean muslin or cheesecloth into a large bowl or pan (I use a glass drinks dispenser).
Add the sugar, vinegar, and yeast if using and stir to dissolve. You can either pour this into bottles (leaving 4cm headspace for expansion) now, to ferment, or if using a large glass drinks dispenser like I do, just sit the lid on top, but don’t seal tightly. You’ll see bubbles form over the next day or so, and this indicates that fermentation has started.
Depending on the season, the bubbles slow down after about a week (slower in winter). At this stage, screw the lid on tightly . Keep a close eye on the brew, if they are plastic and are expanding, loosen the cap/lid to allow some of the bubbles to escape.
Leave another 3-5 days before refrigerating. It keeps for weeks in the fridge. Serve full strength, or with a little mineral water. The longer you keep it, the less sweet it will be, as the yeasts use the sugar.
Bougainvillia Switzel (beverage) from Linda Brennans ‘A Delicious Bunch, Growing and Cooking With Edible Flowers’ p52
4 cups bright, fresh, Bougainvillia bracts
4 cups filtered water
3/4 c white sugar
4 slices of lemon
1c fresh lemon verbena flowers and leaves OR lemon myrtle leaves
1c fresh pineapple pieces
1/2c unpasteurised apple cider vinegar
Rinse the bougainvillea to remove pollen before adding them and the water to a large saucepan. Bring to the boil and simmer gently until the water takes on the colour of the bracts.
Remove from the heat and strain out the bracts, retaining the liquid. Return the coloured liquid to the pot and add the sugar. Stir to dissolve then reheat to boil 1 minute to create a syrup. Turn off the heat and add the lemon slices, leaves and pineapple. Mash them with a potato masher to release the flavours of the fruit. Allow it to infuse in the syrup for 5 minutes. Strain the liquid and keep it, but discard the solids. Cool to room temperature.
Once cooled, add the vinegar and leave on the bench, covered, for 8-12 hours to begin fermentation. This will consume some of the sugar and give you a very slightly effervescent drink. Pour into bottles and refrigerate.
To serve, add ice and chopped seasonal fruits to a glass. Pour in a little switzel concentrate, as you would for cordial. Dilute with soda or mineral water.
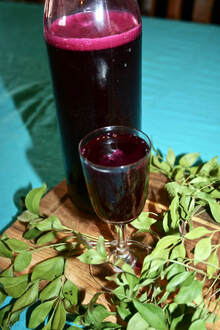
Beet Kvass (Beverage), from EatingEuropean blog
Ingredients
• 9 Organic Beets medium size, peeled, cut into 1/2 inch slices
• 8 cups Water filtered, boiled and cooled off
• 2 tbsp Himalayan Salt
• 1 bulb Garlic all cloves peeled
• 1 tbsp Allspice
• 1 tbsp Black Peppercorn
• 10 Bay leaves
Instructions
• Boil the water with Himalayan salt and cool it off.
• Peel the beets and garlic and assemble them in the stone pot or glass jar.
• Layer beets, garlic and some spices, then repeat until all ingredients are used.
• Pour over the water; If the beets are coming above the water surface, add plate to the pot to keep them down;
• Cover the pot and leave it for five days on a counter;
• Check for white film on the surface daily and if it forms, remove it with wooden spoon. It is harmless.
• After 5 days, strain the kvass and pour into the glass jars or bottles. Refrigerate for up to a few weeks.
Notes
It is very important that the water is boiled and the pot or jar and all utensils that you will be using for kvass are disinfected with the boiling water as well. It will ensure a proper fermentation and reduce the risk of introducing unwanted bacteria into the mixture.
Use gloves, clean knifes and board to prepare beets and garlic;
Use clear wooden spoon to remove white film from the surface daily;
You can gently stir the kvass daily as well.
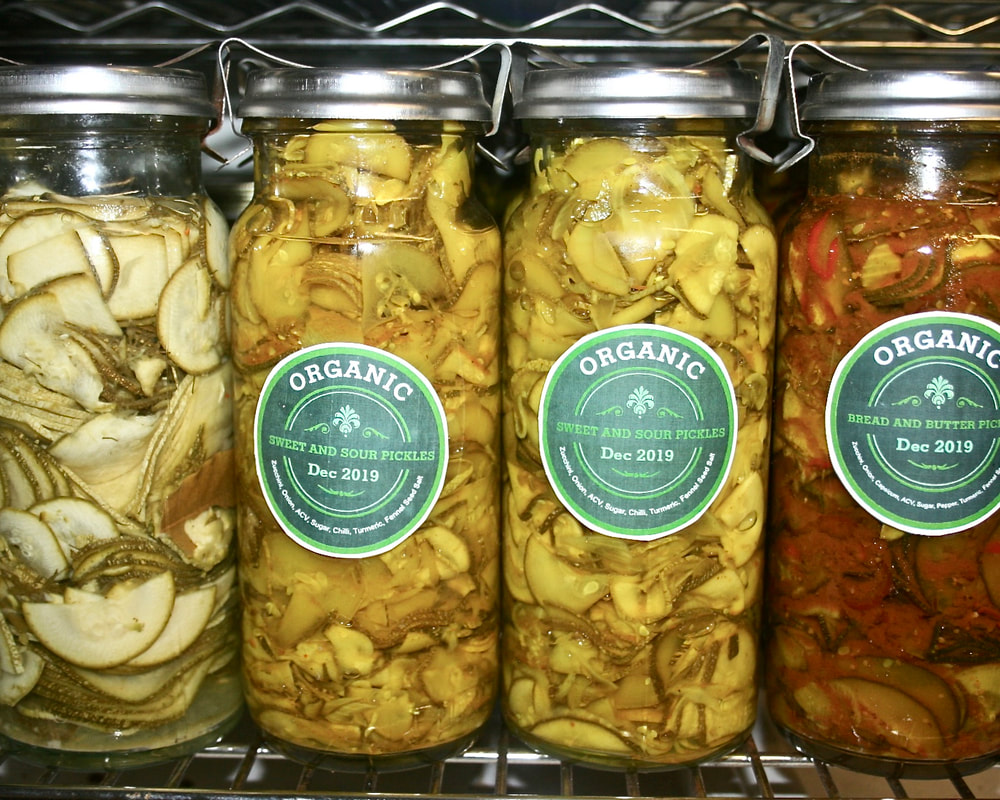
Lactofermented Dill Pickles by Culturesforhealth.com
The so-called "kosher" pickle is not necessarily kosher in the sense that it complies with Jewish food laws. It is called kosher because of its flavor profile made popular by New York’s Jewish pickle makers, known for their natural salt-brined pickles heavily seasoned with dill and garlic. So any pickle that is seasoned in the same fashion is referred to as a kosher dill.
Fermented pickles have been around for hundreds of years and we have the best recipe for you to follow to start making your own fermented pickles.
INGREDIENTS:
• 5 Tbsp. sea salt
• 2 quarts chlorine-free water
• 4-6 grape, oak, horseradish, or bay leaves
• 6-9 cloves garlic, peeled
• 2 large heads of dill
• Spices to taste: black peppercorns, red pepper flakes, mustard seeds, etc. (Secret ingredient: for an extra bite, add a few strips of fresh horseradish to the spice mix!)
• Enough pickling cucumbers to fill a ½-gallon jar
INSTRUCTIONS:
1 Make a brine by dissolving 5 tablespoons sea salt in 2 litres of chlorine-free water. (Note: this recipe will possibly make more than what is needed, you may save extra brine to be used in future ferments.)
2 In a half-gallon jar add a couple of the tannin-containing leaves, a few cloves of garlic, the heads of dill, and ⅓ of the spices.
3 Pack half of the cucumbers tightly on top of the spices. (The longest ones work best at the bottom.)
4 Repeat a layer of leaves, garlic, and spices. Add another tightly packed layer of cucumbers and top them off with more garlic and spices.
5 Pour the brine over the pickles, leaving 1-2 inches of headspace. Place another tannin-containing leaf on top of the pickles as a cover between the pickles and the surface of the brine. Use a fermentation weight to keep the pickles under the liquid, if necessary. Cover the jar with a tight lid, airlock lid, or coffee filter secured with a rubber band.
6 Ferment at room temperature (15-21°C is preferred) until desired flavour and texture are achieved. If using a tight lid, burp daily to release excess pressure. The brine should turn cloudy and bubbly, and the pickles should taste sour when done.
7 Eat right away, or store in a refrigerator or root cellar for months and enjoy them all winter long.
LACTO-FERMENTED BEETS
Recipe by Jody Gowans
Fermentation time: 2 - 4 weeks
INGREDIENTS
Fresh beets (red or golden)- cleaned (peeling optional)
Brine :1 litre water filtered water + 20 grams (approximately 4.5 teaspoons) salt (non-iodized)
Bay leaf
Flavourings (optional): Garlic clove, ginger, fresh herbs
Glass fermentation container
Fermentation weight
DIRECTIONS
Wash and trim beets of greens. Leave skins on if you like.
Cut beets into slices or cubes, as desired.
Place beets, bay leaf and optional flavourings in the fermentation container, leaving a 1" space to the top of the neck of the jar.
Fill with brine, leaving a 1" space to the top of the neck of the jar
Add fermentation weight (if necessary). Close jar.
Leave at room temperature (ideally 55-75 F (18-22 C) ) for 2-4 weeks.
Transfer to the refrigerator for storage.

 RSS Feed
