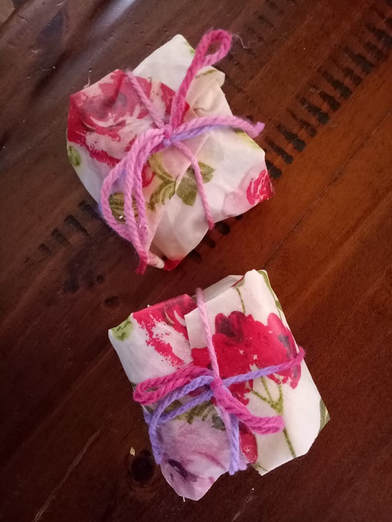
Pictured: Beeswax wraps being used as wrapping paper...kind of like furoshiki :-)
What a great turn out we had for the War On Waste Workshop! Thanks to Margy for her research beforehand and helpful tips...and to our two reps from Council who informed us what can and can't be recycled in our region, how to worm farm and how to compost.
We also had a wealth of knowledge coming from the audience, and it's plain to see this is becoming a passion for a lot of people who want to make a change in the footprint we leave on this earth.
We also had the beeswax wraps demo. As I said at the class, there are multiple ways to make these. You will need cotton fabric (synthetic doesn't play nice, and also defeats the purpose of going to the effort of making a natural product/alternative to cling wrap).
You will also need beeswax, which is often available at the PCYC Sunday Markets in Toowoomba. It's also available online, but it's heavy, so consider the postage costs! And the packaging it creates in having to be posted to you. There is a local beekeeping club, Southern Beekeepers, who may also be able to link you up with some local beeswax.
We demonstrated the beeswax/resin/oil version of these wraps at the class.
Ratio is 1 part pine rosin (2 heaped Tbsp) to 4 parts beeswax (8 heaped Tbsp) and then it was about 1Tbsp of argan oil. You do NOT need to use argan oil. Olive, jojoba and others are fine. I just happened to have argan oil that was a year over it's use by date, so I used it.
After experimenting with a few methods, I found it much better to get a solid glass jar in a saucepan and double boil the wax/rosin/oil mix to melt and blend the ingredients together. This is primarily because the pine rosin 'powder' I ordered had way too many lumps in it that made a mess of the original wraps I made when I was sprinkling the wax/resin mix on the fabric that way.
While this is melting, turn your oven on to about `150 C. I experimented with using a heat gun and hair dryer instead of the oven, but the oven gave the best results for sure!
So when all that wax/resin is melted (and it will likely need a stir every now and then), shut off the heat and leave the water in the saucepan as it helps keep the mix in it's molten state while you work.
Grab a cookie sheet/baking tray and lay your cotton fabric out on that. If you are making a wrap that is larger than your tray, that's not a problem, just fold the fabric in half.
Pour some of your mix onto the fabric and use a silicone brush, or the back of a dessert spoon to spread the wax mix a little. Don't worry if it's uneven or not completely covered, the oven will do the rest for you. Also don't worry if you poured too much wax mix on. It will be there on your tray for the next wrap you make.
Now pop your tray in the oven and you shouldn't need anymore than 5 minutes for the wax to spread and soak into your entire cloth. If you have a folded cloth in there, you'll possibly need to spread the wax around manually when you pull it out. But generally the oven does the work for you.
When you pull your tray out, you need to fairly quickly lift the wrap off the tray and let any excess mix drip off it. I used my fingers, but yes, there is a chance you'll burn yourself, so you can use tongues if you like. If you are near an open window that helps the setting process, or just give the wrap a gentle swish through the air for a minute, it will set very quickly and then you can put it down on the bench or where ever...just not somewhere hot!
That's it! Pretty simple. You can do this without the pine rosin, but it has more stick/cling factor if you use rosin. I got mine through Etsy (online). It was about $30 for 500g and I think that included postage.
A note on cleanup...resin/rosin and wax are messy! You can resurrect the baking tray you use by pouring boiling water over it. But it's much harder to recover the glass jar you use so pick something you don't mind being waxy for the rest of it's days :-)
 RSS Feed
